First, what is pitch bend? What would you use it for? Let me try to answer that for you! There are two ways that immediately come to my mind as to how to use pitch bend. When a real live human singer sings, no matter how perfect they are, there will be very subtle variations in their pitch. A computer, however, will be perfect. This is one of the reasons why a synthesized computer voice will sound "fake" or robotic. So, how can we make it sound more human? By introducing subtle variations in the pitch. It's important though not to do it too much, because if you do, then you will run into the same problem of it sounding fake and robotic again.
So that's the first way you could use pitch bend. But I'm not going to talk about that today. Instead, I'll be talking about using pitch bend to change the actual note. Why would I do that? If I am creating a song in Vocaloid (by the way, I'll always be referring to Vocaloid 3 here), and I have my singer sing these notes (oh, also, when you see the number at the end of the note, I'm referring to the octave):
Eb4
G#4
Bb3
I would just enter those individual notes, right? Why would I enter only Eb4, then use pitch bend to bend it up to G#4 and then bend it down to Bb3?
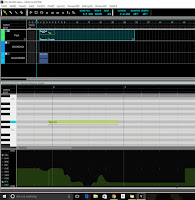
Well, let me give you a real world example. This is a clip from Miley Cyrus's Party in the USA where she is singing the "yeah" part. It's one word, "yeah" stretched over seven different notes. You can enter this separately in Vocaloid like below:
As you can see, it starts out at Eb4, goes down to C#4, then goes further down to Bb3, then all the way down to G#3 (which is the bottom of the range for this example), then back up to Bb3, then up to C#4, and then finishes back down at Bb3.
And this is how Megumi sings this. It's kind of clunky. Keep in mind though, that this is just the raw notes. I haven't done anything to them to smooth it out. So keep in mind, you do have the option of doing it this way--you just have to tweak a bunch of parameters to make it sound better.
To do this, you could use this Phonetic for the first lyric: j{
That will give you Yeah
Then that would be followed by six separate lyrics, all connected using this Phonetic: e, which gives you the -eh sound.
You can see that Megumi does a pretty good job at connecting those last six vowel sounds together by default.
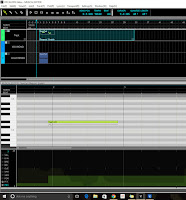
But what happens if you just enter a single lyric, Yeah, and then use pitch bend to bend that Eb4 to hit the other six notes? Here's how it sounds with Megumi using pitch bend. It sounds better, right? There's more of a natural slurring between the notes. The downside, however, of using this method is that you pretty much have no idea what note you are playing when you are looking at the Vocaloid grid. It just appears as Eb4. So it's really up to you how you want to do this.
Let's say you've decided to use the pitch bend method to do this. So how would we go about doing it? First, we need to see the Control Parameters grid. If you go to the menu bar at the top and select View(V), you will see the option to display it.
 |
| You can view the Control Parameters on the bottom by clicking on View(V) at the menu bar on top |
You can also see that I've already altered the pitch bend for that note. See how those curves line up below the Eb4 note on the grid? I drew those using the pencil tool at the top left below the menu bar.
The trick is, how the heck do I know where to draw those curves? There is nothing on that grid that tells me what the note is. Simple trial and error would take forever. We don't want to do that. Here's where some simple math comes in.
First, see those number values on the bottom left? On the top above the parameter VEL, we have 8191. At the very bottom below PBS, we have -8192. That's how we can control the pitch. The note will correspond to a numerical value ranging from -8192 to 8191. Zero is in the middle. Vocaloid allows us to bend a pitch 24 semi-tones. That's two whole octaves! But for this, we don't need two octaves.
The range of notes that we want to pitch bend starts at Eb4 and goes all the way down to G#3. We know that we will never bend the pitch above Eb4 nor will we ever go down below G#3. That means we have a range of 7 semi-tones, so we need to set our pitch bend sensitivity, the PBS, to 7.
 |
| You can see that the Pitch Bend Sensitivity (PBS) has been set to 7, which is our range |
For this, I used the line tool rather than the pencil tool so we have a uniform range throughout the note that we want to pitch bend. You can see in the picture on the left that PBS is now set to 7.
Why is it important that we set the PBS? Well, first, the default value is 1, so unless we change it, we would be unable to bend the pitch beyond one semi-tone. Second, having a range of notes--an upper limit and a bottom limit, helps us to better control the pitch. Why use other values if we will never use them? So set the PBS so that it matches the max range of notes you will be using.
Luckily for us, the very first note, the Eb4, is also our highest note. This note will have the numerical value of 0 as this is our default pitch. All the other notes that follow will be notes that will have the pitch bend downward. So our notes will have values from 0 to -8192. Our range of notes is 7 (semi-tones), so all we have to do is divide 8192 by 7 which equals to about 1170. We don't have to worry about being exact because there is no way you can draw the PBS curve exactly. Now we know that each note will have a value of about 1170 apart from each other, so we know the approximate values of the notes we will use, like this:
Eb4 : 0
D4 : -1170
C#4 : -2341
C4 : -3511
B3 : -4681
Bb3 : -5851
A3 : -7021
G#3 : -8192
I've bolded the notes that we will be using for this. When Miley Cyrus sings the "Yeah" part, she sings Eb4, C#4, Bb3, G#3, Bb3, C#4, Bb3.
So, to duplicate this, we need a steady hand. You will have to play back her singing and then note the spot where the note changes and then draw the appropriate curve with the pencil tool to match it. When you hold the cursor over the grid, you will see the numerical value change depending on where your cursor is. Again, don't worry about getting the value exact when drawing the curve. Your ear won't be able to tell the difference between -2341 and-2350. In fact, it will probably be more realistic having your notes wobble a bit back and forth. It might take you a few attempts to get the hang of it, but after a while, you'll get use to drawing those curves to match what you want.
If you have any questions, please leave a comment and I'll try to answer it as best I can. I'm a lazy dude, but I'll try to remember to check in for comments. In the meantime, rock on!


No comments:
Post a Comment